Contents
CHRONO
User manualGPS lap timer
Contents
CHRONO- 01Quick startYour first run
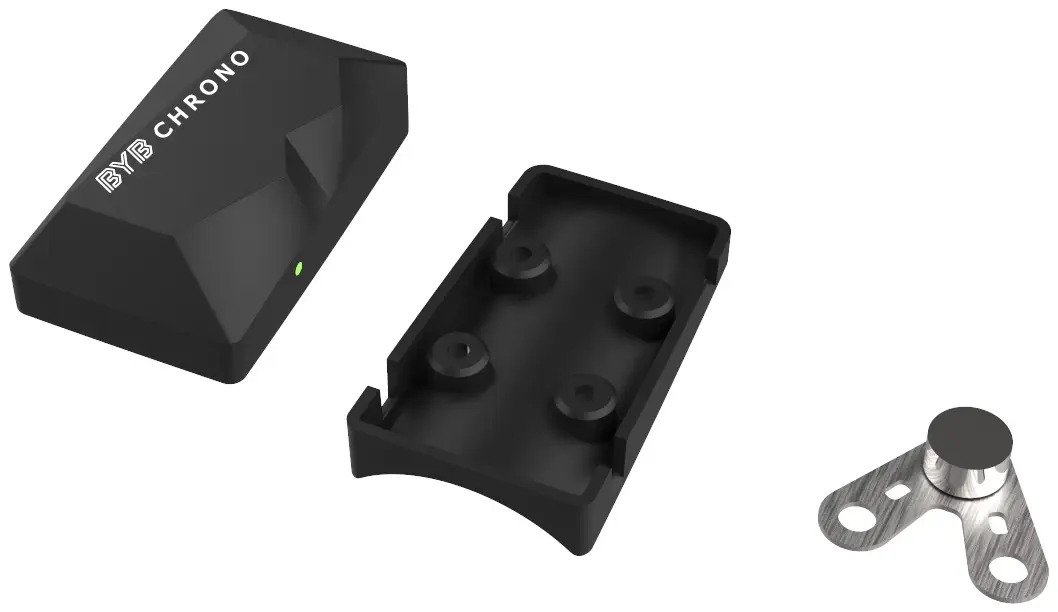
- 02What’s in the box?Components list
- 03MountingWhere to mount · Speed sensor magnet
- 04The deviceMain features · Buttons and LEDs
- 05Using the deviceButtons · LEDs
- 06Wireless connectionConnecting to Chrono
- 07ConfigurationSettings reference · Operating modes · Lap type · Trigger ID · Wheel size · BLE sensors · IMU orientation
- 08External triggerButtons and LEDs · Connecting to a trigger · Configuration · Trigger positioning
- 09Charging the deviceBattery charging
- 10Cleaning the deviceDevice cleaning
- 11TroubleshootingThe Wi-Fi password is refused · The Wi-Fi connection is unstable · The device cannot get a GPS fix · The recorded run has no GPS map · The device is unresponsive
- 12SpecificationsTechnical data
Quick start
Your first run
- Mount Chrono.Use the supplied plastic mount.Fix it securely to the frame, chassis or helmet.The top of the device must face the sky.Full steps in Where to mount.
- Switch on and wait for the GPS fix.Press the power button once — the power LED turns solid green.Wait for the run LED to turn solid green. A first fix can take up to 5 minutes.
- Record.Press the run button once — the run LED blinks slowly while recording.Press it again to stop.
- Connect to the app.Hold the run button for 2 seconds to enable Wi-Fi — the run LED blinks quickly.Join the Wi-Fi network BYB-Chrono with the default password bybchrono.Open the BYB Chrono app and go to the device page to change settings and download runs.
- Optional — extend the setup.Pair an external trigger or BLE sensors from the app.Set the lap type, wheel size and other options.Full steps in Settings reference.
What’s in the box?
Chrono is a complete lap timing system.
Components list
| Qty | Item |
|---|---|
| 1 | BYB Chrono device |
| 1 | Plastic mount |
| 3 | M3×5 screws |
| 1 | Velcro strap |
| 1 | Speed sensor magnet |
Mounting
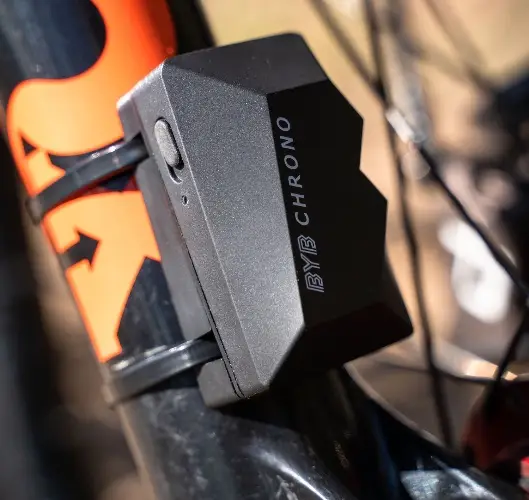
Chrono can be fitted anywhere on a vehicle, or on a helmet. Placement decides how quickly and how accurately it sees satellites.
Where to mount
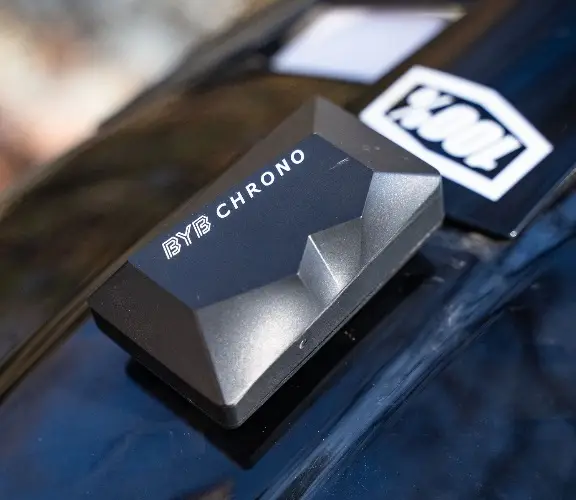
Position the device so that its top — the side carrying the button interface and the BYB Chrono logo — faces upward, toward the sky. A clear view of the sky is what gives a fast fix and accurate positioning.
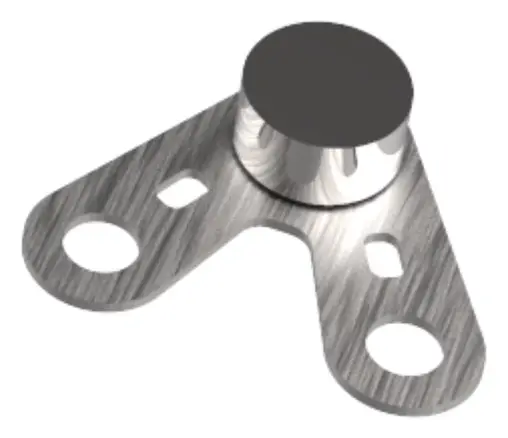
The supplied plastic mount covers most installations on a frame, chassis, handlebar, roll cage or helmet. Alternatively, the three M3 threaded interfaces can be used to build a dedicated custom mounting.
Speed sensor magnet
The magnet is only needed when the speed sensor is in use — see Operating modes.
- Fit the magnet to the spokes or to the disc with two thin cable ties.
- Check that the magnet is detected — the speed sensor LED turns green while a magnet passes it.
- Enter the wheel diameter in the app. See Wheel size.
The device
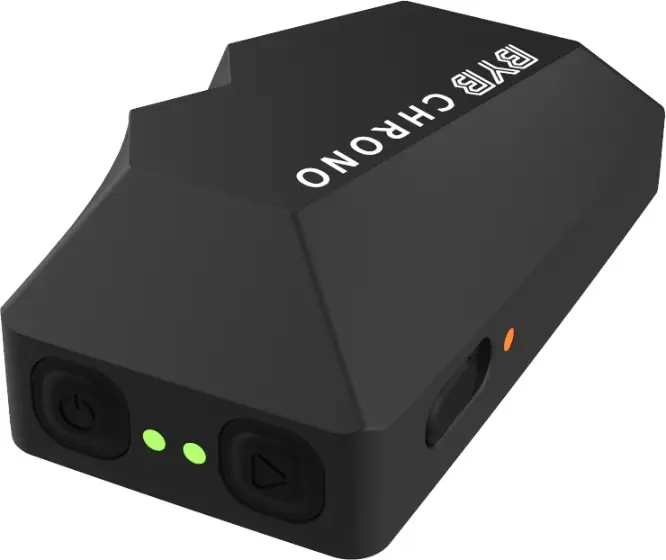
Chrono is an accurate lap timer built around a high-rate multiconstellation GPS module, with an optional speed sensor and external triggers.
Main features
- High accuracy GPS antenna, 25 Hz update rate.
- Multi-band, multi-constellation GPS module.
- Built-in speed sensor input.
- Compatible with BYB Chrono external triggers.
- BLE heart rate and power meter sensor support.
- Compact, lightweight and waterproof (IP65).
- Wireless connection to the BYB Chrono app for iOS and Android, and to the BYB Telemetry software.
The device can be run in four configurations, from GPS alone to GPS with both a speed sensor and external triggers. They are described in Operating modes.
Buttons and LEDs
The buttons and LEDs carry every function of the device. What each button does is in Buttons; the power, run and charging LEDs are in LEDs.
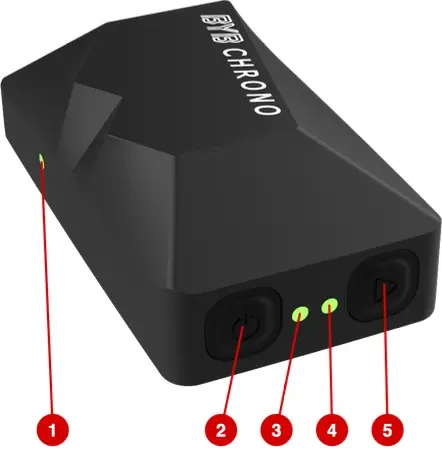
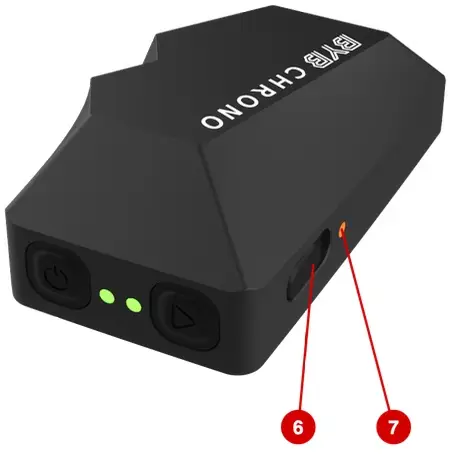
| Control | What it is | |
|---|---|---|
| 1 | Speed sensor LED | Feedback from the speed sensor. |
| 2 | Power button | Switches the device on and off. |
| 3 | Power LED | The state of the device. |
| 4 | Run LED | The state of the acquisition. |
| 5 | Run button | Starts and stops a recording, and enables connection mode. |
| 6 | Micro USB port | Charging, under a protective cap. |
| 7 | Charging LED | Lit while the battery is charging. |
Using the device
What every button and LED does. Everything else is done in the app.
LEDs
| LED | State | Meaning |
|---|---|---|
| Power | Solid | The device is powered on. |
| Power | Blinking | Battery below 40%. |
| Run | Off | Ready to acquire, no GPS fix yet. |
| Run | Solid | Ready to acquire, GPS fix acquired. |
| Run | Blinking slowly | Sampling data. |
| Run | Blinking quickly | Connection mode is active. |
| Charging | Solid | The battery is charging. |
Wireless connection
Chrono is configured over its own Wi-Fi network. The app talks to one device at a time.
Connecting to Chrono
- Network name
- BYB-Chrono
- Password
- bybchrono
- Switch the device on and hold the run button for 2 seconds. The run LED starts blinking quickly.
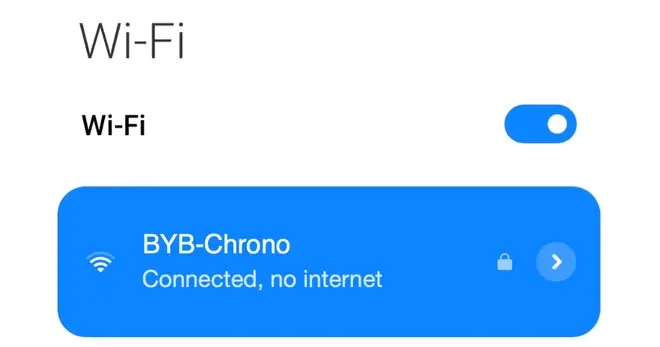
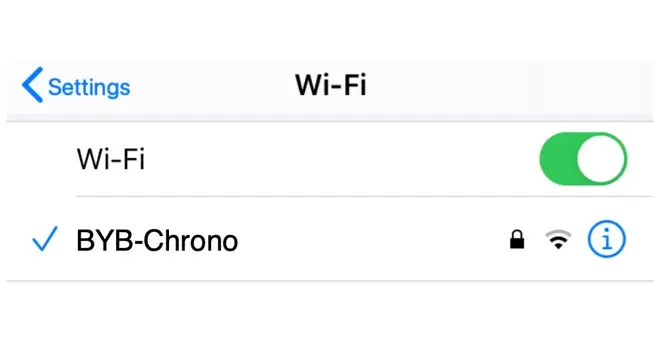
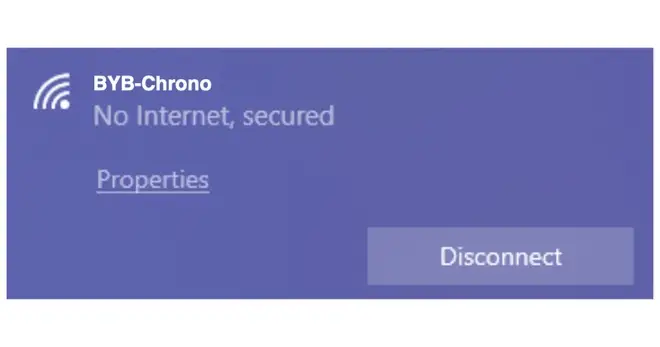
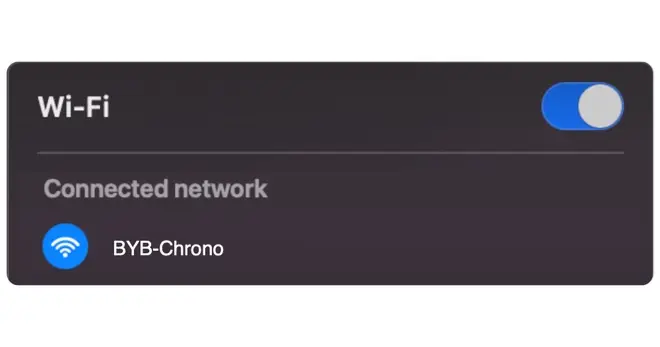
- On your phone or computer, look for the Wi-Fi network above in the list.Once the device has been renamed, the network is BYB- followed by the new device name. See Settings reference.
- Connect using the password above — all lower case, one word, no spaces.
- Your device may report "Connected" or "Connected without internet" — both are normal.
- Open the device page in the app and wait for the data to load. Settings can now be changed and runs downloaded.
Configuration
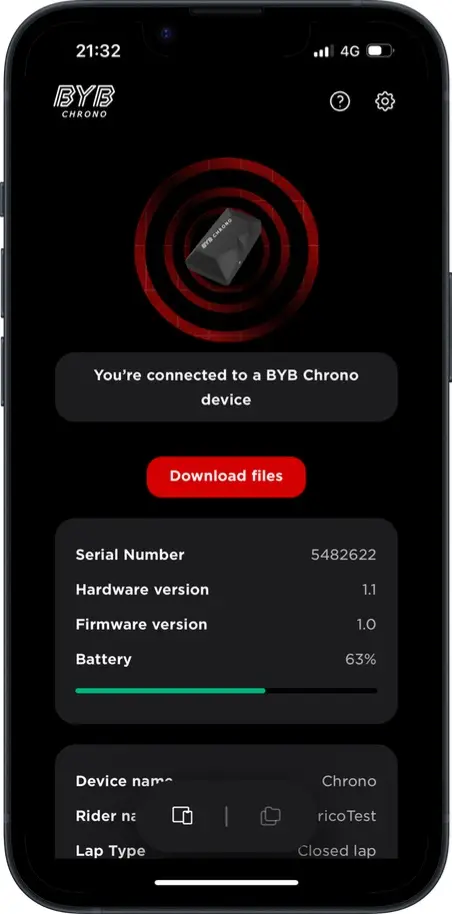
Every setting lives in the device page of the BYB Chrono app, reached over Wi-Fi. Connect first — see [[wifi-chrono]].
Settings reference
- Device name
- The name assigned to the device. In connection mode it is also the Wi-Fi network name, as BYB- followed by this name — BYB-Chrono until it is changed.
- Rider name
- The rider associated with the device.
- Lap type
- Closed or open circuit. See Lap type.
- External trigger
- Enables or disables the use of external triggers.
- External trigger ID
- The ID of the trigger or triggers in use. It must match the ID set in the triggers themselves. See Trigger ID.
- Speed sensor
- Enables or disables the built-in speed sensor.
- Wheel diameter
- The size of the wheel the speed sensor reads, used to calculate speed and distance. See Wheel size.
- Heart rate sensor
- Enables or disables a BLE heart rate sensor. Enabling it activates Bluetooth Low Energy.
- Power meter sensor
- Enables or disables a BLE power meter. Enabling it activates Bluetooth Low Energy.
- IMU orientation
- How the device is installed, used to calculate advanced metrics. See IMU orientation.
- Device password
- The password of the device’s Wi-Fi network.
- Format SD
- Erases every run stored in the memory.
- Factory reset
- Returns the whole device to its factory configuration.
Operating modes
Chrono runs in four configurations. GPS is always active; the speed sensor and the external trigger are each switched on or off in the configuration menu, and the combination is the mode.
| Mode | Speed sensor | External trigger | What it records |
|---|---|---|---|
| GPS | No | No | Full route and GPS speed |
| GPS + speed sensor | Yes | No | Full route, speed and distance from the speed sensor |
| GPS + external trigger | No | Yes | Full route and trigger timing |
| GPS + speed sensor + external trigger | Yes | Yes | Route, speed and distance from the speed sensor, trigger timing |
GPS alone records the complete route and speed, and is the basis of every other mode. Route data cannot be loaded into the app without a fix, so always wait for one.
Adding the speed sensor gives accurate speed and distance based on wheel rotation. It can improve accuracy where GPS reception is weak, such as under tree cover, and makes distance-based comparison between runs more accurate. Route and distance from GPS are always recorded; the speed sensor adds a second, wheel-based distance.
Adding external triggers gives timing that does not depend on GPS reception quality: each trigger is placed along the track and records the exact moment it is crossed.
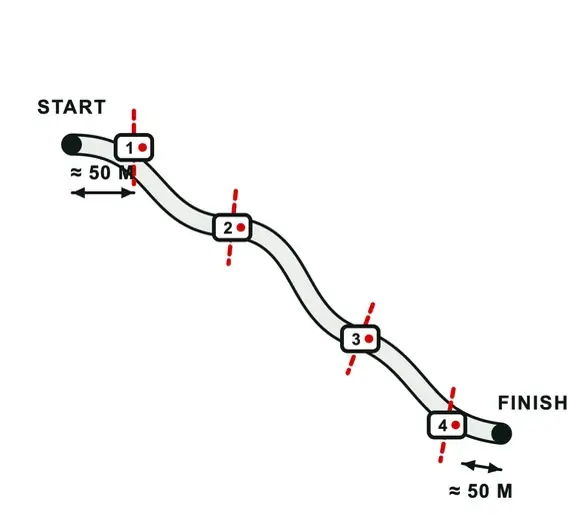
- Open lap — at least two triggers are mandatory: one at the start, one at the finish.
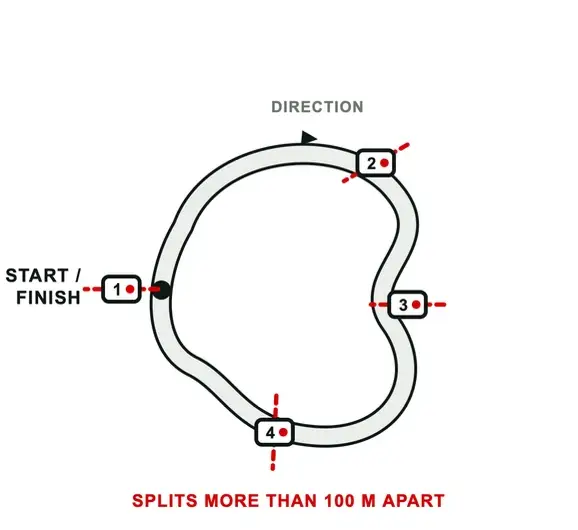
- Closed lap — one trigger at the shared start/finish line is enough.
- Any further triggers act as intermediate splits.
The total number of triggers in use must be entered in the app.
Using both together is the most precise and comprehensive mode — speed, distance and timing in one recording.
Lap type
- Open lap
- The track has a distinct start and a distinct finish; entry and exit points are separate.
- Closed lap
- The track is a loop with a shared start/finish line. The entry and exit laps are automatically excluded from every calculation.
Trigger ID
The trigger ID is the name that pairs a trigger with the device. It can be customised; the default is Chrono. The trigger itself — its buttons and LEDs, how to connect to it, its own settings and where to place it — is covered in External trigger.
Wheel size
The wheel size tells the device how far one revolution of the wheel carries the vehicle, so it can turn sensor pulses into speed and distance. It refers to the wheel the built-in speed sensor reads.
Select a standard size from the list, or enter a custom diameter in millimetres.
BLE sensors
Chrono connects to commercial BLE heart rate monitors and power meters. Each sensor is paired once; its unique ID is then stored in the device for later sessions.
- Wake the sensor — wear the heart rate strap, or move the power meter.
- Enable Wi-Fi mode on the device.
- Open the app and go to the device configuration menu.
- Tap "Scan heart rate sensor" or "Scan cycling power meter sensor".
- Wait for pairing to finish — the unique code of the paired sensor is displayed.
- Set "Heart rate sensor" or "Power meter sensor" to YES before starting a run.
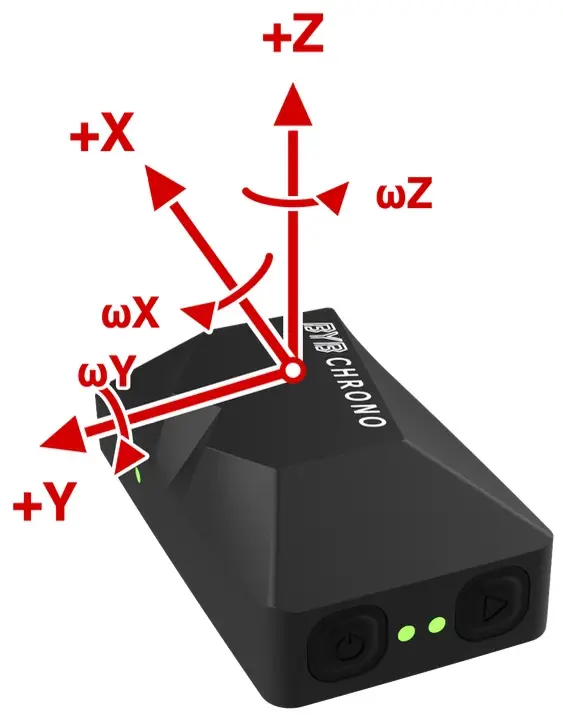
IMU orientation
The IMU orientation tells the device how it is installed, so that the direction of each axis is known and advanced metrics can be calculated.
Set the X, Y and Z directions to match the way the device sits on the vehicle.
External trigger
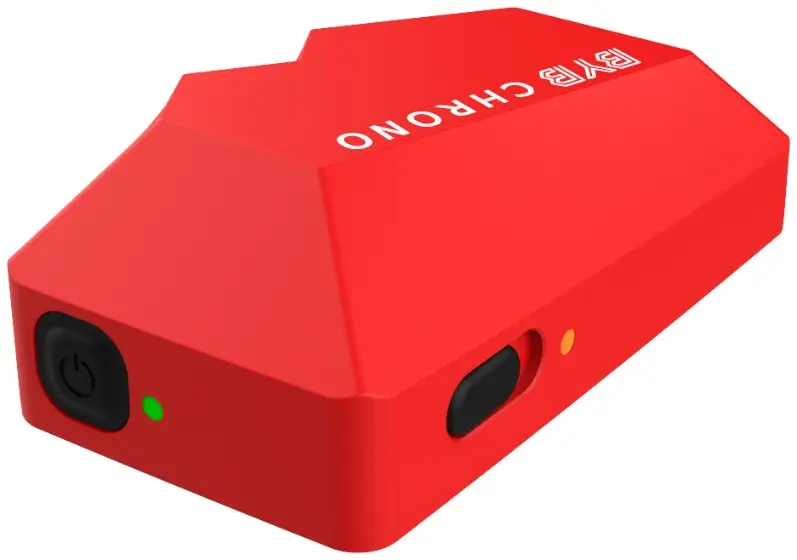
The external trigger is an optional device placed on the track. It records the exact moment it is crossed, independently of GPS reception. It has its own buttons, its own Wi-Fi network and its own settings.
Buttons and LEDs
| Action | Button | Result |
|---|---|---|
| Switch on | Power, one press | The power LED starts blinking slowly. |
| Switch off | Power, one press | The device powers down. |
| Factory reset | Power, hold 8 s | Default settings are restored. |
| Force restart | Power, hold 15 s | The device restarts automatically. |
| LED | State | Meaning |
|---|---|---|
| Power | Off | The trigger is switched off. |
| Power | Blinking slowly | The trigger is on and active. |
| Charging | Solid | The battery is charging. |
Connecting to a trigger
A trigger is configured the same way as Chrono: it creates its own Wi-Fi network, and the app talks to one device at a time. Connect to the trigger to change its settings, then reconnect to Chrono to record.
- Network name
- TRIGGER-CHRONO
- Password
- bybchrono
- Switch the trigger on. The power LED starts blinking slowly.
- On your phone or computer, look for the Wi-Fi network above in the list.
- Connect using the password above — all lower case, one word, no spaces.
- Your device may report "Connected" or "Connected without internet" — both are normal.
- Open the device page in the app and wait for the data to load. The trigger settings can now be changed.
Configuration
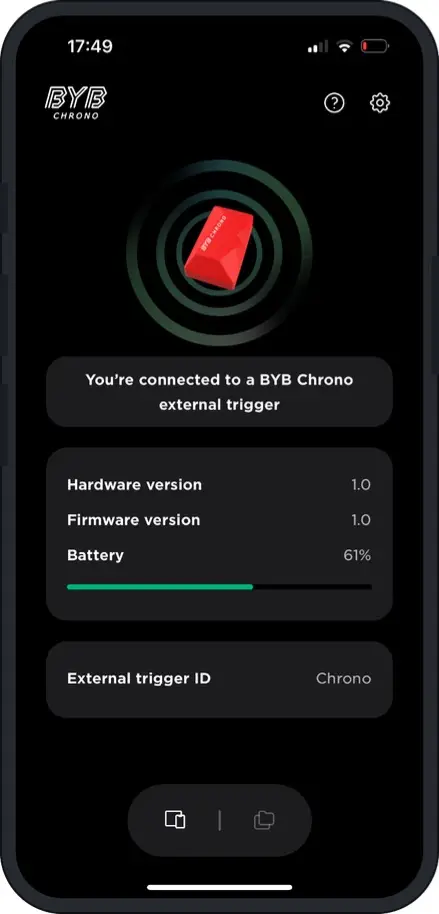
- External trigger ID
- The unique identifier of the trigger. Its Wi-Fi network appears as TRIGGER-CHRONO. The same ID must be entered in the Chrono configuration — see Trigger ID.
- Device password
- The password of the trigger’s Wi-Fi network.
- Factory reset
- Returns the trigger to its factory configuration.
The trigger settings are reached over its own Wi-Fi network — see Connecting to a trigger.
Trigger positioning
Where the triggers sit on the track decides the quality of the timing.
- Open lap — place a trigger about 50 m after the start point and about 50 m before the stop point.
- Closed lap — place the trigger at the start/finish line, as far as possible from any intersection.
- Keep intermediate triggers more than 100 m apart.
Charging the device
Internal rechargeable battery, 5 V 1 A.
Battery charging
- Remove the micro USB protective cap.
- Connect a micro USB cable to the port.
- Charge from a PC USB port or a phone charger rated 5 V, 1 A.
- Wait for the charging LED to go out — lit means charging, off means fully charged.
- Refit the protective cap before the next ride.
Cleaning the device
It is a professional instrument. Treat it like one.
Device cleaning
Chrono is an electronic device. Clean it gently with water and a soft cloth.
Troubleshooting
Find the symptom, apply the fix. Anything not here: info@bybtech.it.
The Wi-Fi password is refused
- Try the default password: bybchrono.
- If the password was changed and is lost, factory reset the device by holding the power button for 8 seconds, then connect again with the default password.
The Wi-Fi connection is unstable
Some phones drop the device network because it offers no internet access.
Disable mobile data, or turn off the option that switches automatically to a network with internet access, while the device is connected.
The device cannot get a GPS fix
Switch the device on a few minutes before the run and leave it in a steady position with a clear view of the sky — two to ten minutes is usually enough. The run LED turns solid green once a reliable 3D fix is acquired.
The recorded run has no GPS map
Logging started before a solid fix was acquired. Always wait for the run LED to turn solid green before starting an acquisition — see The device cannot get a GPS fix.
The device is unresponsive
Hold the power button until the device reboots, about 15 seconds.
Specifications
Technical data
| Chrono | |
|---|---|
| GPS update rate | 25 Hz |
| GPS module | Multi-band, multi-constellation |
| Speed sensor | Built in, magnet supplied |
| BLE sensors | Heart rate, cycling power meter |
| External triggers | Supported, optional |
| Protection rating | IP65 |
| Charging input | 5 V, 1 A |
| Charging port | Micro USB, capped |
| Wireless | Wi-Fi to the BYB Chrono app (iOS, Android) |